


What are the steps for retrofitting an Alfa Laval pump seal?
May 16, 2025
Leave a message
Hey there! As a supplier of Alfa Laval pump seals, I often get asked about the steps for retrofitting these seals. So, I thought I'd put together this blog post to walk you through the process. Whether you're a maintenance pro or just looking to learn more about pump seal retrofitting, this guide is for you.
Step 1: Assess the Situation
The first thing you need to do is take a good look at your current pump and seal setup. Check for any signs of wear, damage, or leaks. You'll want to note down the model and specifications of your Alfa Laval pump and the existing seal. This info is crucial as it'll help you choose the right replacement seal. You can also check if there are any operational issues with the pump, like unusual noises or vibrations. These could be signs that the seal is failing or that there are other underlying problems.
Step 2: Select the Right Seal
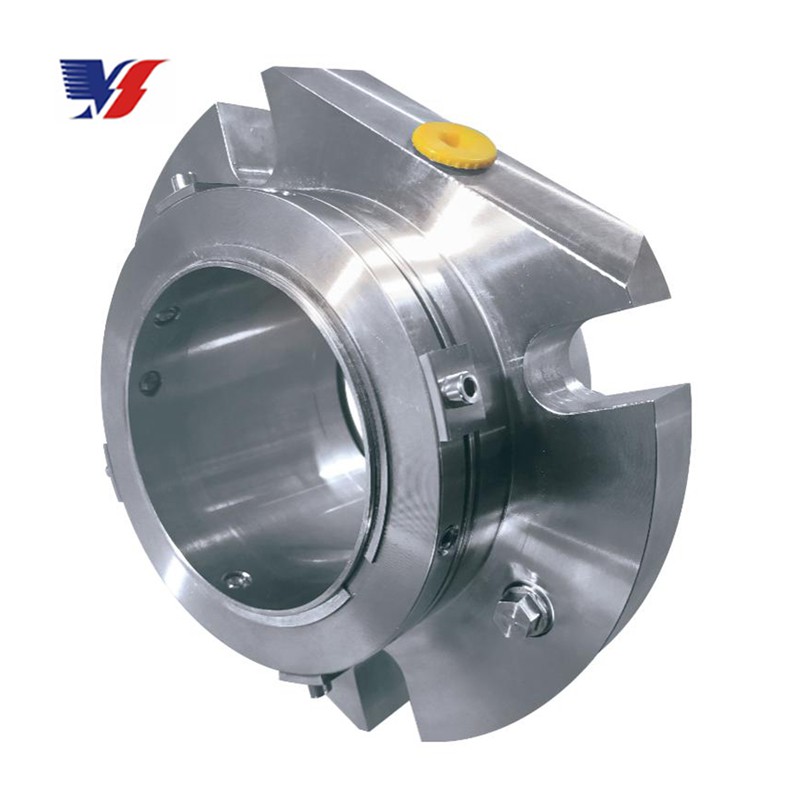
Once you've assessed the situation, it's time to pick the right seal for your pump. There are different types of seals available, and choosing the correct one is key to a successful retrofit. For example, Single Cartridge Mechanical Seal is a popular choice for many applications. It's easy to install and provides reliable sealing performance. Another option is the Gear Pump Mechanical Seal, which is specifically designed for gear pumps. If you're looking for a more comprehensive solution, Cartridge Seals Pumps offer a complete sealing system that's pre-assembled and ready to install.
When selecting a seal, make sure it's compatible with your pump's operating conditions, including temperature, pressure, and the type of fluid being pumped. You can refer to the pump's manual or consult with an expert if you're not sure which seal is right for you.
Step 3: Gather the Necessary Tools
Before you start the retrofit process, gather all the tools you'll need. This typically includes wrenches, screwdrivers, pliers, and a seal installation tool. Having the right tools on hand will make the job go much smoother. You might also want to have some cleaning supplies, like a degreaser and a lint-free cloth, to clean the pump and the seal housing before installation.
Step 4: Shut Down and Isolate the Pump
Safety first! Before you do any work on the pump, make sure it's shut down and isolated from its power source. This will prevent any accidental startup while you're working. You should also relieve any pressure in the pump system and drain the fluid from the pump and the seal chamber. This will make the retrofit process safer and easier.
Step 5: Remove the Old Seal
Once the pump is shut down and isolated, it's time to remove the old seal. Start by removing any covers or guards that are protecting the seal. Then, use your tools to loosen and remove the bolts or clamps that are holding the seal in place. Carefully lift the old seal out of the pump and set it aside. Be careful not to damage the pump or the seal housing while removing the old seal.
Step 6: Clean the Pump and Seal Housing
After removing the old seal, it's important to clean the pump and the seal housing thoroughly. Use a degreaser and a lint-free cloth to remove any dirt, debris, or old sealant from the surfaces. Pay special attention to the seal mating surfaces, as any dirt or damage on these surfaces can affect the performance of the new seal. Make sure the surfaces are completely dry before proceeding with the installation.
Step 7: Install the New Seal
Now it's time to install the new seal. Start by applying a thin layer of lubricant to the seal faces and the O-rings. This will make it easier to install the seal and prevent damage to the seal during installation. Carefully place the new seal into the seal housing, making sure it's properly aligned. Use your seal installation tool to gently press the seal into place until it's fully seated. Then, tighten the bolts or clamps that hold the seal in place, but be careful not to over-tighten them.

Step 8: Reassemble the Pump
Once the new seal is installed, it's time to reassemble the pump. Replace any covers or guards that you removed earlier. Make sure all the components are properly aligned and tightened. Then, refill the pump with fluid and check for any leaks. You can also run the pump for a few minutes to make sure it's operating properly.
Step 9: Test the Pump
After reassembling the pump, it's important to test it to make sure the new seal is working properly. Start the pump and check for any leaks or unusual noises. Monitor the pump's performance for a few hours to make sure everything is running smoothly. If you notice any issues, shut down the pump immediately and check the seal installation.
Step 10: Monitor and Maintain the Pump
Once the pump is up and running, it's important to monitor and maintain it regularly. Check the seal for any signs of wear or damage on a regular basis. You should also follow the manufacturer's recommended maintenance schedule for the pump, including changing the oil, filters, and other components as needed. By keeping the pump properly maintained, you can extend the life of the seal and prevent costly breakdowns.
Well, there you have it - the steps for retrofitting an Alfa Laval pump seal. I hope this guide has been helpful to you. If you have any questions or need help choosing the right seal for your pump, don't hesitate to reach out. We're here to help you with all your pump seal needs. Whether you're looking for a Single Cartridge Mechanical Seal, a Gear Pump Mechanical Seal, or a Cartridge Seals Pumps, we've got you covered.

So, if you're in the market for a new pump seal or need to retrofit your existing one, give us a shout. We'll work with you to find the best solution for your specific needs. Let's get your pump running smoothly again!
References
- Alfa Laval Pump Manuals
- Industry Standards for Pump Seal Installation and Maintenance
Send Inquiry